Lawn & Garden Tips
The University of Maryland Home & Garden Information Center can help with questions concerning lawn, landscaping, and gardening. They can be reached at (800) 342-2507 or at: The University of Maryland College of Agriculture & Natural Resources
DIY Garden Ideas
Flower TowerVertical Garden
Tower of Herbs
*If you have any DIY garden ideas to share, please contact us.

Vegetable Gardens
Everyone loves fresh vegetables. Many lucky homeowners/renters in The Landings of Cedar Cove have acquired green thumbs and can grow their own vegetables. Vegetable gardens can be simple to extravagant and enjoyable to grow and to consume. To ensure that property values and the overall beauty of the neighborhood are protected, residents need to make sure that their vegetable garden is maintained properly and not a nuisance to others. Please take in mind when you have vegetable gardens to do the following:
• All vegetable gardens are only permitted in back yards and must not be visible from the street (this also includes corner lots).
• The garden will not be placed on an easement or on any Common Area.
• When the garden is not being used to grow vegetables, the plants, poles, and other garden equipment must be removed and the ground tilled.
• Garden must be properly maintained; dead plants removed, weed free, etc.
• Dead plants must be immediately removed.
• Residents should use materials around their vegetables gardens that discourage unpleasant odors and is visually pleasing. Examples: soil, wood chips, bark mulch, pine needles, river rock, and stones/pebbles/gravel.
• The vegetable garden must NOT attract animals/rodents and the resident is expected to take appropriate measures to discourage the attraction of animals/rodents.
• Vegetable gardens may also be in planters, containers, hanging baskets, etc. and the rules above apply to them as well.
Composting
No Lot shall be used or maintained as a dumping ground for garbage, trash or other waste material, and all incinerators and other equipment for the storage or disposal of garbage, trash or other waste material shall be kept in a clean and sanitary condition. (Declaration- Article V Architectural Control & Article VI Use Restrictions #6)
Open composting attracts rodents and snakes, creates unpleasant odors, and is unsightly. To preserve and protect the value of the properties within the Landings, no open composting is allowed.
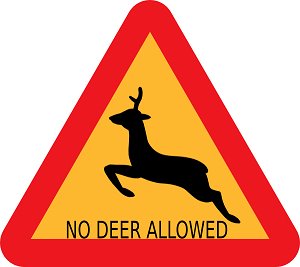
How To Keep Deer Out Of Vegetable Gardens
One of the hardest things that a gardener must face is how to keep deer and other pests out of their vegetable garden. These intruders can invade a vegetable garden causing damage to the property as well as loss of crops. Fortunately, you can take steps to help deter deer.
Here are a few suggestions:
1. Surround your vegetable gardens with plants that a deer finds offensive such as marigolds, astilbe, catmint or morning glory. Try adding patches of strongly scented herbs—from garlic and chives, to mint and lavender. These plants have a bad taste or strong odor that a deer would avoid. Use these plants as borders for each row of vegetables to create a "natural fence" to help deter the deer.
2. Use perfumed soaps or scented fabric softeners. A deer finds the strong scents coming from these items irritating and offensive. Hang scented soaps in old stockings or unused scented fabric softeners on a string and tie them to several posts near your vegetable garden so that the deer will smell them right away.
3. Spray organic odor-emitting deer repellents. Put chili powder, hot and cayenne peppers together and water in a blender. Blend for one minute and let it stand overnight. Strain the mixture using cheesecloth and pour it in a spray bottle. Spray mixture on the vegetable garden to deter a deer from getting closer. The strong smell will irritate a deer; therefore, it will avoid the areas where the odor is coming from. Reapply after heavy rains.
4. Put up some posts and run clear fishing line at various heights around your garden to keep deer out.
5. Trim tall grasses to deter bedding deer. Pick vegetables once they're ripe, and discard crops right after harvest.
6. Place netting over vegetables.
Mowing or Grasscycling – Lawns
Proper mowing greatly improves the appearance of lawns, promotes a healthy root system, reduces weed encroachment, and lessens disease pressure.
Mowing height
- Low mowing is a major cause of lawn deterioration. Remove no more than one-third of the grass blade each time you mow. For example, to maintain a 3" height, mow when the grass reaches a height of 4". Mowing to the proper height can reduce weeds and diseases by 50% to 80% in tall fescue. Scalping the lawn is a major cause of a crabgrass infestation.
- Removing larger amounts of leaf surface may result in physiological shock to the plant, cause excessive graying or browning of leaf tips, and greatly curtail photosynthesis reducing the health of the grass.
- Low mowing also stresses the root system causing the turf to become weaker and less drought tolerant.
- Raise the mower height up one-half to one inch higher during hot, dry periods in the summer. And do not mow when grass is dormant during the hottest, driest part of the summer.
Recommended mowing heights
- Tall fescue - 3" - 4" or set the mowing height on your mower's highest setting, especially in the hottest, driest part of the summer.
- Kentucky bluegrass - 2 1/2" - 3 1/2"
- Fine fescue - avoid mowing in the hottest, driest part of the summer - 3"- 4"
- Zoysiagrass - 1/2" - 1"
Frequency of cut
- Infrequent mowing allows the turf to grow too tall. Subsequent mowing removes too much leaf surface and may shock the plants.
- Weekly mowing may not be enough, especially during the peak period of leaf growth in the spring.
The rate of growth depends on weather, season, soil fertility, moisture conditions, and species. - Grasscycling (see below) can be practiced on lawns cut at proper intervals.
- Sharpen mower blades at the beginning of the mowing season and then again every 4-6 weeks.
Grasscycling
Grasscycling is the simple practice of letting grass clippings decompose on the lawn after mowing.
- Helps protect the environment by reducing the amount of grass clippings in the landfill.
- Encourages a healthier lawn by returning both macronutrients and micronutrients to the soil in a slow-release form. Can reduce fertilizer use by 25%, saving time, and money and decreasing the amount of runoff into the Chesapeake Bay and its tributaries.
- Eliminates the need to bag or rake grass clippings.
- Does not contribute to thatch buildup or increase turf diseases. Grass clippings are largely composed of water and decompose rapidly. Microbial decomposition of clippings occurs on soils that are maintained at a pH of 6.0 to 6.8.
Tips on grasscycling
- Mow with sharp blades.
- Mow the lawn when dry. After a rainy period, large clumps of grass can be remowed or raked up and removed.
- Mow on a regular basis. Remove no more than one-third of the leaf blade. During the spring it may be necessary to mow twice a week.
- Mulching mowers hasten the decomposition process but are not necessary. Check availability of mulching "kits" which can be purchased for some models of lawnmowers. Kits include a plate that blocks discharged shoots, forcing clippings back through the blades. Check your lawn mower manual for information.
- Avoid the overuse of fertilizer.
Source: umd.edu

Lawn Watering Tips
Once you have an established lawn, water on an as-needed basis, not on a regular schedule (this includes when using an irrigation system). Water in the early morning, before 10 a.m. to minimize leaf wetness. Wet grass promotes disease problems. Water if the grass blades begin to wilt, develop a blue-gray color, or show footprints after being walked upon. Water slowly to prevent runoff. Use a sprinkler to apply 1 inch of water to the lawn. Place a shallow can in the area being watered to monitor the amount being applied. After an inch of water collects in the can, check the soil moisture. Insert a screwdriver or other type of probe in the area. The soil should be moist 4 to 6 inches down. Frequent, shallow watering, as sometimes applied with an irrigation system, tends to keep the upper layers of soil near a point of saturation most of the time. This encourages shallow rooting, disease and insect problems.
Source: https://extension.umd.edu/resource/watering-lawns

Fertilizing Lawns in Spring, Summer, Fall: A Schedule
Your grass craves periodic feedings, and it is best to meet this need for periodic feedings by fertilizing lawns with "slow-release" products. You'll find such products at local home improvement stores, such as Lowe's and Home Depot. Because these products release their nutrients over time, rather than all at once, fertilizing lawns with them allows the grass to "eat" at its own leisure. As nutrients are released, the root system of your grass fills in any bare patches, depriving weed seeds of a place to germinate.
Scotts suggests a four-part schedule for fertilizing lawns. The schedule will depend on where you live and your grass-type; but, as an example, here’s the schedule for a Northern lawn composed of a mixture of bluegrass, ryegrass and fescue.
Sample Schedule for Fertilizing Lawns
1. Apply a fertilizer called, “Scotts Turf Builder With Halts Crabgrass Preventer” in April or May. Fertilizing lawns goes hand in hand with weed control.
2. “Scotts Turf Builder With PLUS 2 Weed Control” can be applied in June. This fertilizer fills the need for additional weed control, as the herbicide component fights everything from ground ivy to purslane to white clover.
3. In July or August, apply “Scotts Turf Builder with SummerGuard.” This fertilizer is billed by Scotts as a product that “strengthens and summer-proofs" your grass while "combating a spectrum of harsh seasonal threats like insects, heat and drought.”
4. Finally, Scotts WinterGuard fertilizer should be applied in fall. Fertilizing lawns with this product will not only prepare grass for winter, but also give you a head start towards achieving the green turf you’ll want next spring –- bringing us full circle.
*Before fertilizing lawns with these products, read the instructions on the bag carefully (or ask someone at the store for details). A particular product may not be suitable for your type of grass. Likewise, when applying fertilizers, follow directions explicitly, concerning how much to apply, how often they should be applied, and under what conditions they should be applied.
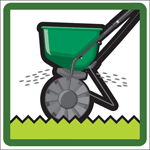
Fertilizing lawns is best done with a spreader. Be advised not to fill the applicator with the spreader parked on the grass. Doing so invites grass-burn, as you may accidentally discharge too much while loading. Instead, fill the applicator somewhere else, then wheel the spreader onto the grass.
For more information go to: https://www.thespruce.com/schedule-for-fertilizing-lawns-2132205

Maintain Your Curb Appeal With These Yard Tips
A well-maintained yard can boost your property value, put you in the good graces of your neighbors, and even prevent a break-in. Here's a breakdown of the four basic skills needed to keep your yard looking sharp. Source: lifehacker.com
Trim Your Hedges to Keep Things Neat
Not only does keeping your hedges trimmed looks nice, believe it or not it is a deterrent to any would-be thief.
To lower the risk of a break in, increase visibility by trimming all bushes and hedges to 3 feet or shorter. Anything taller and you create a hiding place for criminals. Lower shrubs also increase visibility for your neighbors and pedestrian onlookers, who can report fishy activity. Police officers at Tulane University have indicated that an ideal target for a criminal is a house surrounded by large hedges and shrubs, because they block visibility from the street and neighbors’ homes.
When trimming, start with the vertical sides of the hedge first and use an upward and downward sweeping motion and move forward along the hedge. When cutting the top of the hedge, angle the blades at around 10 degrees to the horizontal and sweep cut material off the hedge. You can also do a back and forth action with an electric trimmer allowing you to really detail it. After trimming come back and shake the hedge and then come through once again and trim any access with a manual hand shears or pruner just to catch the little details and find tune the shape of your bushes. Rake up the debris and dispose of properly. Be sure to spray your electric trimmer with a little bit of WD-40 or some Teflon every time you are done to keep your blades clean, sharp, and to last you a long time.
Mow Your Lawn the Right Way
Mowing is pruning. Proper mowing increases the density of the lawn, which in turn decreases weeds. Each type of grass has a recommended mowing height. To determine the proper height to set your mower to depends upon your grass type. Most lawns in the Landings are tall fescue and the recommended mowing height is 2.5 to 3.5 inches during the summer. Always follow the 1/3 rule: never remove more than 1/3 of the grass blade length at any one time. Repeated close mowing can produce a brown lawn making the lawn weak, allowing weeds to grow and take over your yard.
Here are some things to remember:
• Mow when the grass is dry. The blades will be upright and less likely to clump when cut.
• Keep mower blades sharp and balanced. Ragged cuts made by dull blades increase the chance of disease and pests.
• Do not allow grass clippings to "bunch", not only is it unsightly, it will suffocate the grass underneath and kill the grass.
• Change the mowing pattern each time you mow. Grass develops a grain based on your cutting direction, tending to lean towards the direction you mow. Alternating the pattern causes more upright growth and helps avoid producing ruts in the lawn.
Blow Away the Mess
Leaf blowers are a great way to quickly clear cut grass, leaves and debris from your yard. Before you start blowing, be sure to close all windows and doors in your house to minimize dirt and air contaminants that might enter your home. Use your blower in one direction and work the debris from the corners in. Lift the blower up and down in the air to quickly ease and feather the debris into place for cleanup.
Trim and Edge Your Yard for a Clean Look
A weed whacker is a great tool to cut grass and trim areas around trees, gardens and walkways. To start trimming, keep the trimmer 2-3 inches from the ground and avoid hitting trees, shrubs, and roots. The string travels at up to 400 mph and can do a lot of damage to plants and trees in a short period of time. When trimming along a sidewalk, pitch the trimmer slightly up which will taper the cut of your lawn and show a gradual transition from the sidewalk to the lawn.
For a more angled cut, use the edger feature on the weed whacker. Flip the trimmer vertical (like an airplane propeller) and work in a straight line. Look right down the shaft of the weed whacker, between the shaft and the guard, and you can see where the weed whacker has cut. You'll kick up dirt and debris but will have a sharp edge when you're done. Or use a lawn edger for a nice, clean edge. 
Landscaping on a Budget
Even though your time and your finances are limited, you would still like your yard to be attractive and welcoming. Creating a low-maintenance yard on a budget has its challenges, but there are many ways to meet them. Good planning, a little gardening knowledge, creativity and a willingness to think outside the window-box are all you need to make your yard an enjoyable oasis for family and visitors alike.
Take a good look at your landscaping. Does it need some help? Well, most landscaping is just fine, you just need to spruce it up a bit and all it takes is some elbow grease and a little of your time.
When you are able, do one chore below at a time to spruce up your yard. Breaking it down into smaller steps makes it easier for you to achieve your goal.
Shape unsightly or overgrown trees and shrubs. Prune any overgrown trees or shrubs, especially ones that hang over your roof or touch your home. Rake up the debris and dispose of properly.
Tend to flower beds. Tidy up your plants that don't look as good as they should. Remove dead plants, leaves, grass, weeds, debris, etc. from all flower beds. A little bit of TLC goes a long way to make your flower beds look nice.
Touch up the mulch. Nothing spruces up a place like a new application of mulch, so apply a fresh layer in all your flower beds. The color enhances the contrast of the surrounding plants and makes everything pop. What's more, mulch is relatively cheap and easy to apply.
Greet Guests with Flowers. Flowers always make a home seem more welcoming. Adorn your entrance with assorted annuals and perennials to keep your home awash with color all year long. To maximize the effect of bright annual colors, use small numbers of annuals in hanging baskets, planters or containers and place them where they will definitely be noticed. Put a single brightly colored pot of zinnias by the front door or beside the garage door, rather than planting them in a thin border along the front of the house. Fill a terra-cotta planter with herbs instead; they will do double duty as decorative edibles. Choose one or two distinctive pots that make a decorative statement even when they are empty. As seasons change, use them for potted tulips or daffodils, followed by geraniums and then chrysanthemums.
Check regularly for problems. Staying on top of it makes is easier on you in the long run. Waiting until your landscaping becomes unsightly makes it an extremely undesirable chore and much harder to do.
Pages
- Home
- Landings HOA
- About Us
- Location
- Home Owners Association
- Community Standard
- Contact HOA
- FAQ
- Important Numbers & Websites
- Community Happenings
- Calendar of Events
- Neighborhood News
- Volunteer
- Tips
- Lawn & Garden Tips
- Fall & Winter Tips
- Documents & Information
- Public Documents
- HOA Dues
- Property Improvements
- Concerns/Complaints
- Rental Property
- Landlords
- Renters
- Cedar Cove Community Assocation
- Cedar Cove Community Beach
- Committee Documents
- Board Documents
- Board 2010
- Board 2011
- Board 2012
- Board 2013
- Board 2014
- Board 2015
- Board 2016
- Board 2017
- Board 2018
- Board 2019
- Board 2020
- Board 2021
- Board 2022
- Board 2023
- Board 2024

